3D Printing
3D printing
In this blog, we are going to go through what we did for the 3D printing activity.
Documentation of design in Fusion 360 and 3D print of object
Cura setting used for printing the object.
Why the item made could not be easily made subtractively.
Original design files
Pictures and videos of printing process and objects.
Reflection on activity
Documentation of design in Fusion 360 and 3D print of objects
For my 3D object, I intend to design a wheel which looks similar to the picture below.
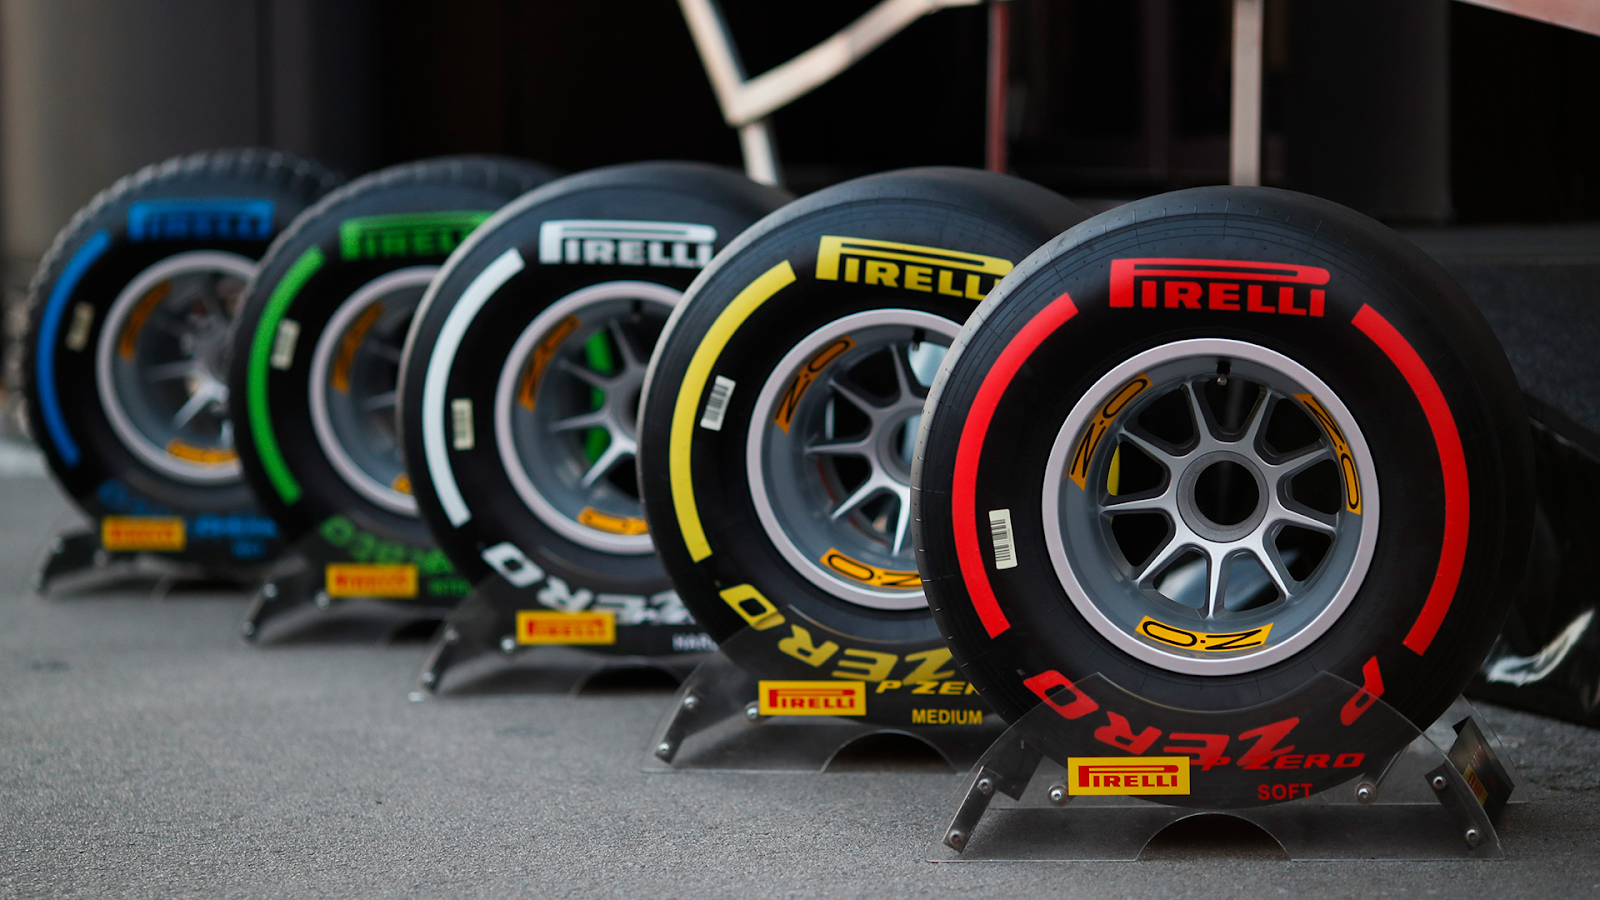
I wanted to try designing something simple yet unique as I have never designed something circular before and I want to venture out of my comfort zone.
The design is also parametric which allows the size of the wheel to be adjusted to what you prefer most.
I found a video online and followed the instructions, adding my own twist to some of the parts to make it unique to me.
The link to the video can be found here
Step 1
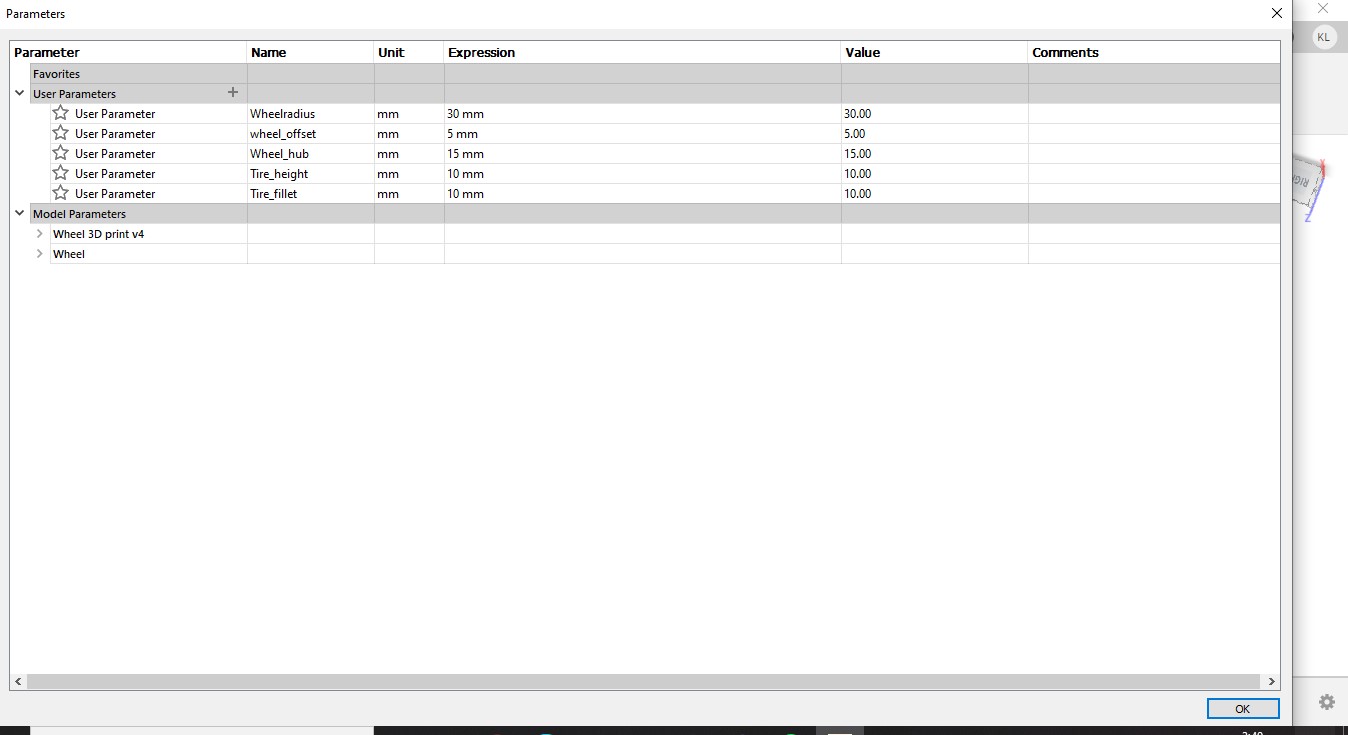
The first step is to create parameters and set the values for the different parameters.The values I have used can be found in the image.
Step 2

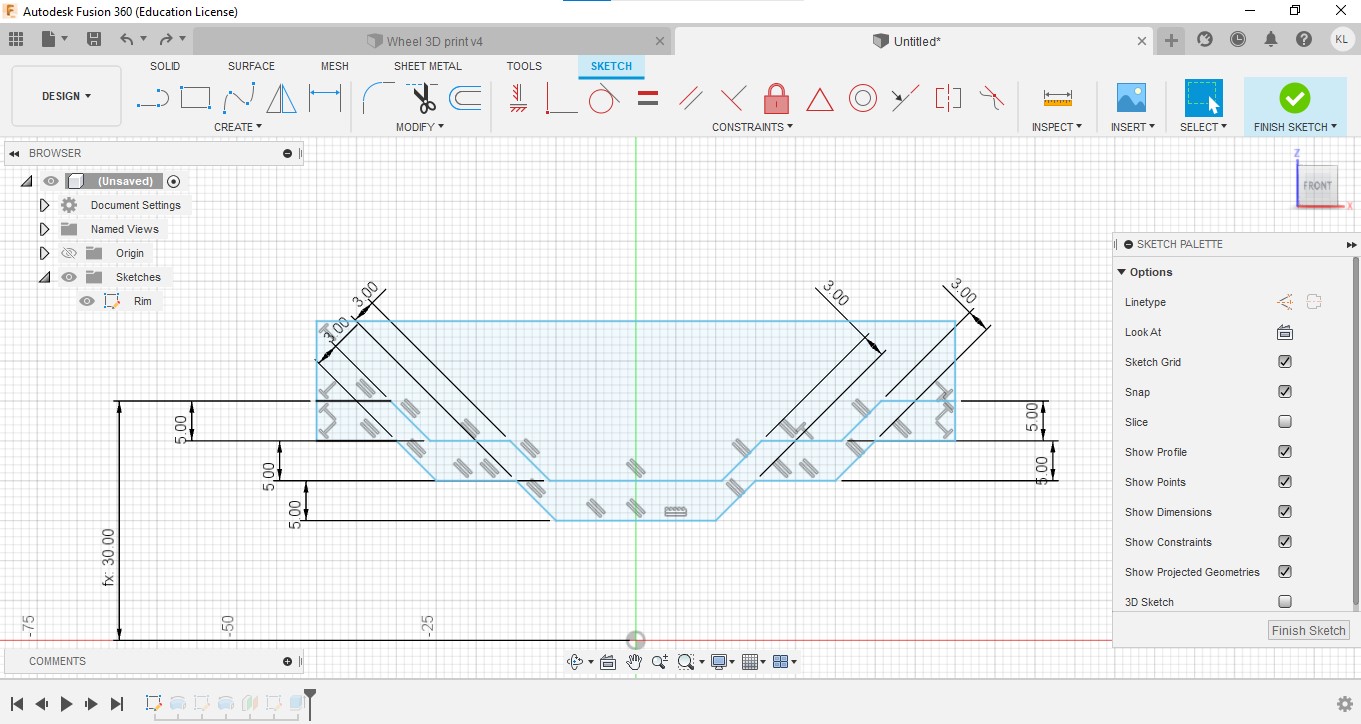
We are now going to create the cross sectional area of the rim.The design is entirely up to and can be adjusted to how you want it.
Step 3
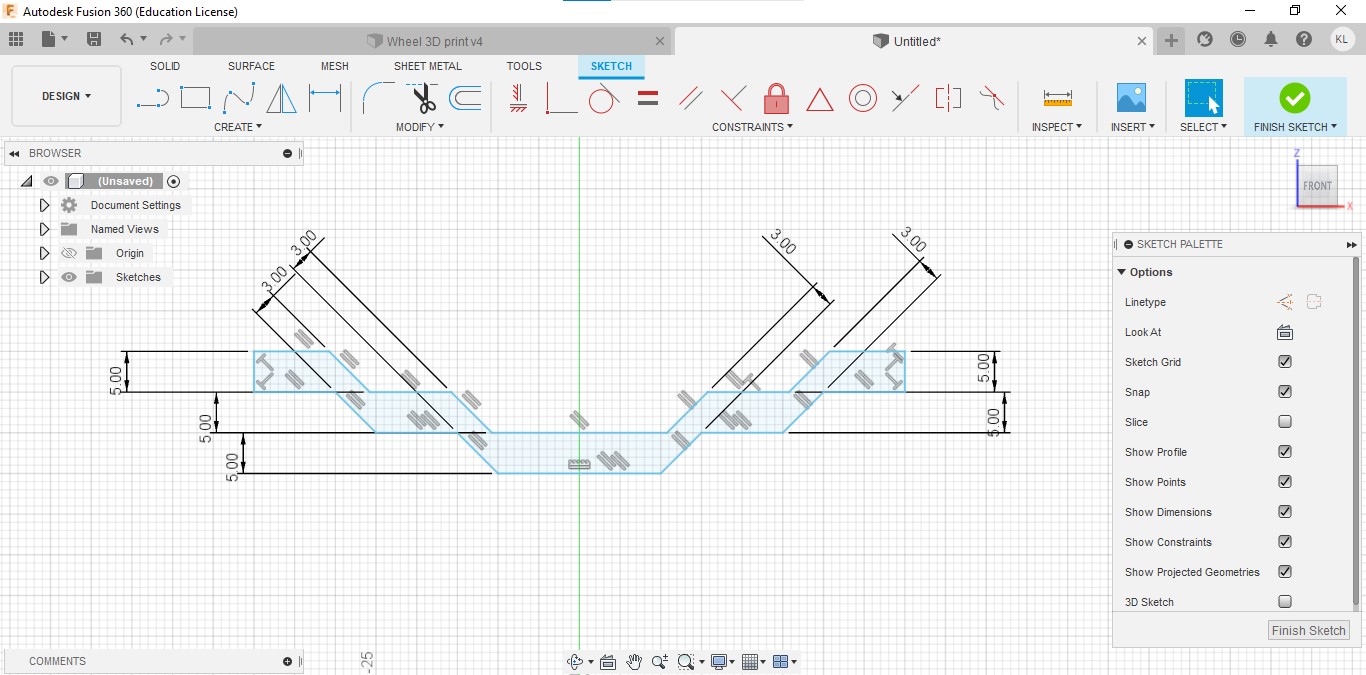
I used the dimension tool to ensure that the difference in length between any two lines are the same.
Step 4

Next, I use the dimension tool and select the highest point of the rim and the center of the plane and key in the Wheel radius.This would be the radius of the wheel and can be adjusted to the value you prefer. Once you are done,click on the finish sketch button on the top right.
Step 5
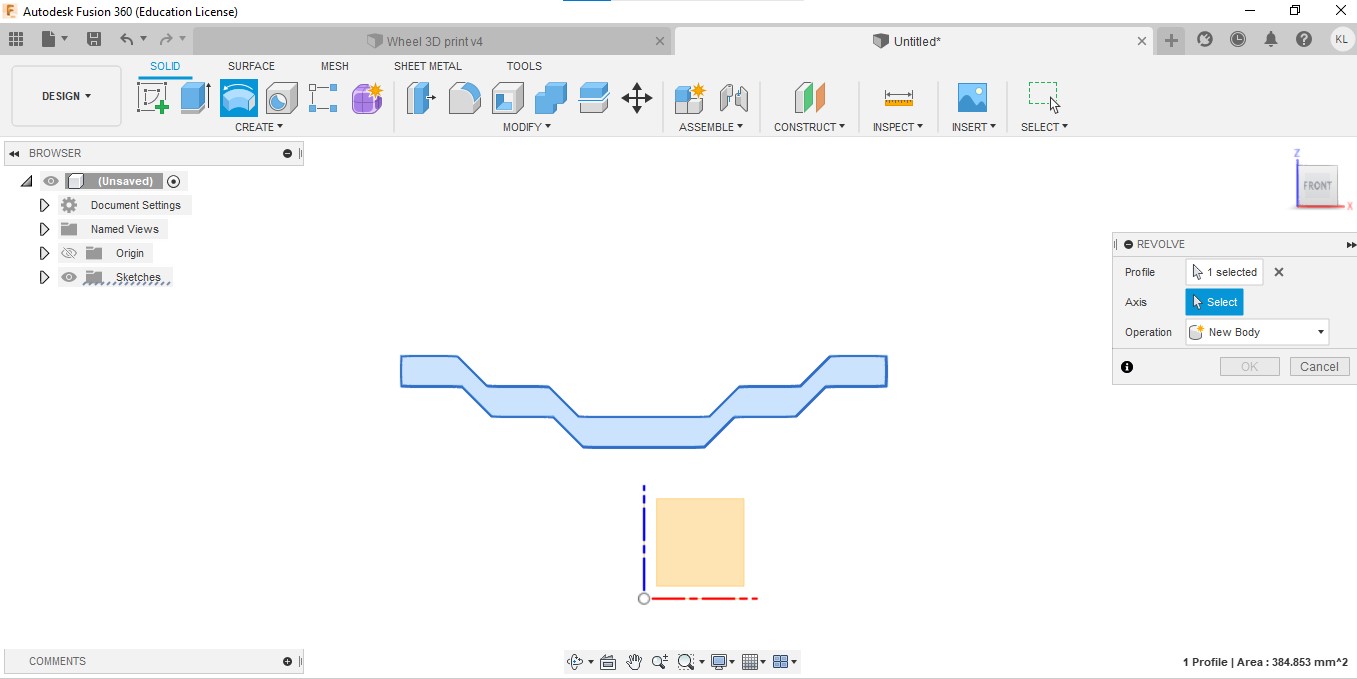
Use the revolve tool that can be found beside the extrude tool in the create tab. Click on the sketch that we just created and choose the axis to be the red line. Revolve it 360° around the red line.
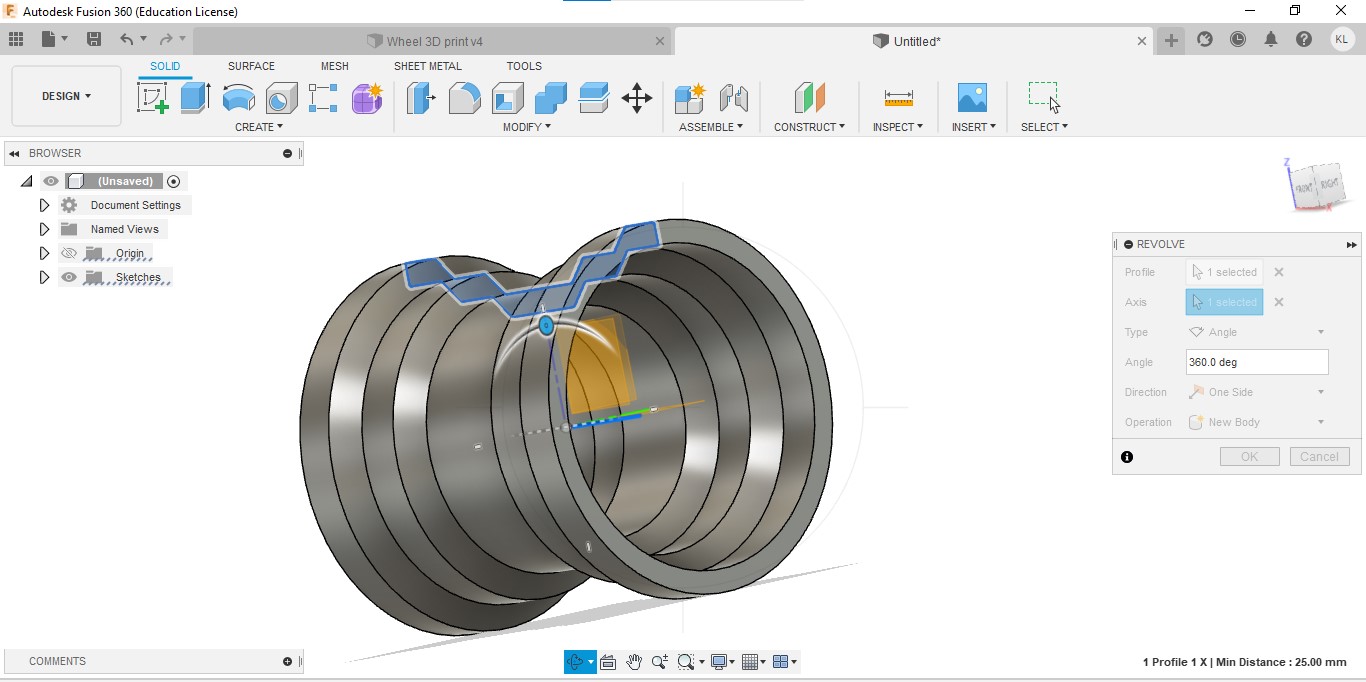
It should look something like this if done properly.
Step 6
Next,we will create another sketch while facing the front of the rim.

We will use a 3 point arc and position it at the height of the middle rim and the other point on the red line. For the final point,you can position it in the middle of both points and choose how much angle you want the rim design to have.

I created 3 more lines to join the top point of the arc and the bottom point of the arc together.
Step 7

We are then going to use the dimension tool and ensure that the gap between the line and our point is our Wheel Offset
Do this for both sides to ensure that when we cut out the design of the front rim, it would not cut through the rim later on.

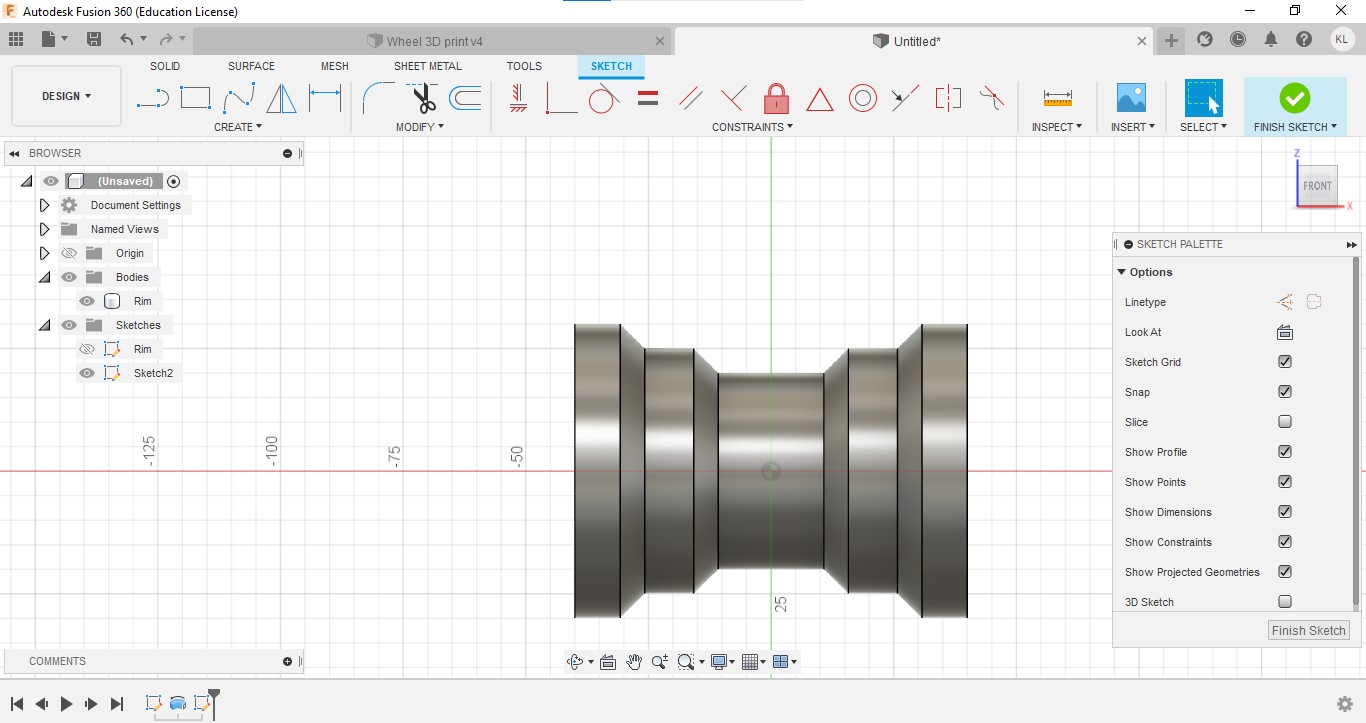
After you are done setting the Wheel offset, it should look like this from the front view.
Step 8

Using the revolve tool, we are going to revolve the sketch that we just made around the red axis.
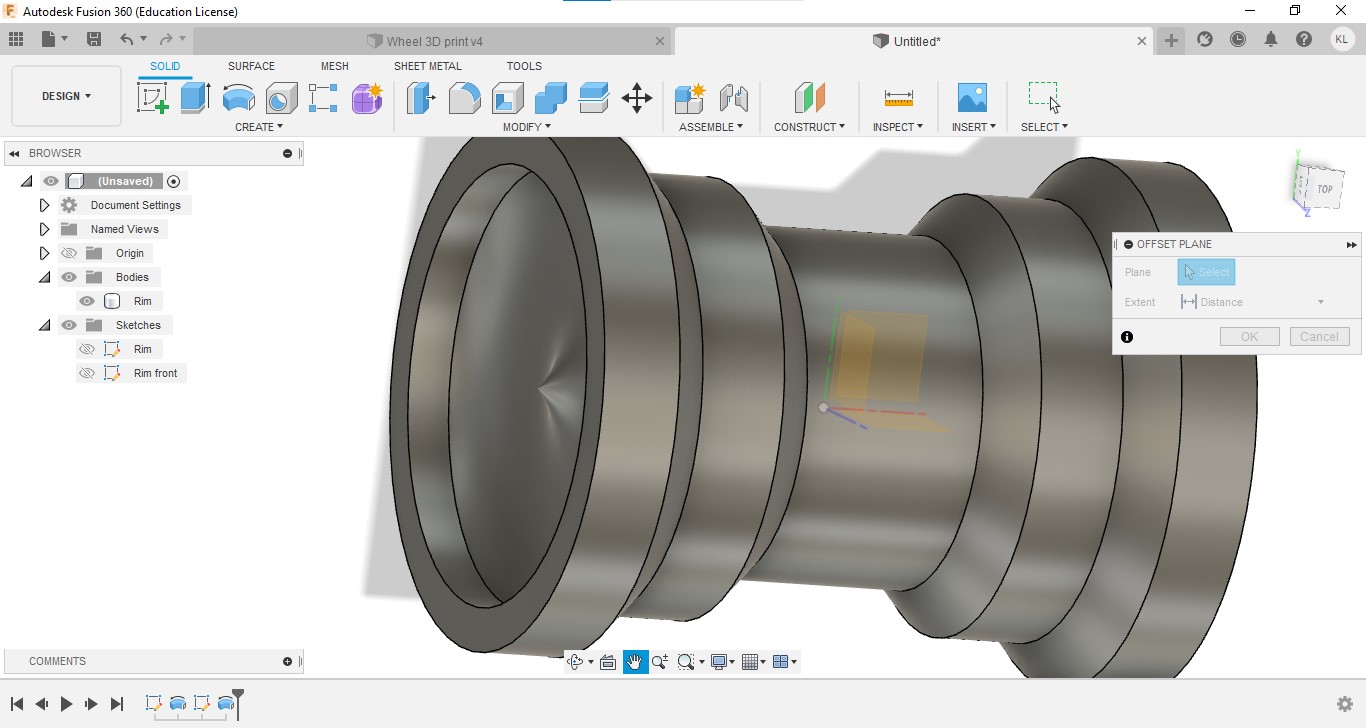
It should look something like this after revolving the sketch. We are also going to construct an offset plane and move the plane forward for us to have an easier time to sketch the design of the rim as the software is not able to cut materials on a curved surface.
Move the plane facing the curved surface in front of the rim.It should look like this from the side.
Step 9

For this part, we would be designing our rim and this part is entirely up to you to design it.
I create a new sketch on the left face of the rim and the create a circle from the middle point and key in Wheel Hub.This would set the diameter of the circle to our set value.

Next,I created another circle with a diameter slightly lesser than the outer surface of the rim. This is to ensure that when we cut the design it will not cut on the outer surface of the rim.
Step 10

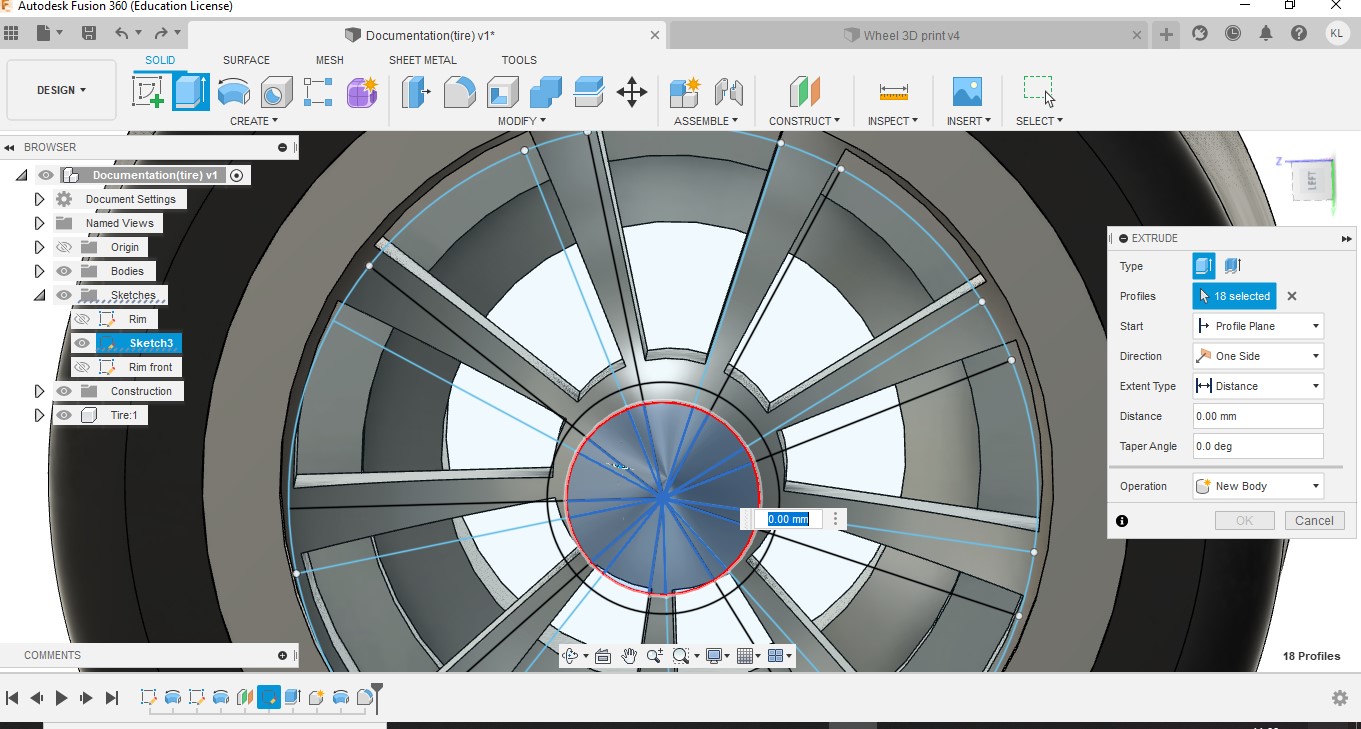
Now we will be designing the rim. I will design a simple design so that it will be too complicated. I use the line tool and start from the centre of the rim to the sketch of the larger circle. I create another line that is 40° away from the first initial line and also stops on the edge of the sketch of the larger circle.

Next,go to the create tab and go to the circular pattern and click on the two lines that we have just created. Select the quantity you want in your design. I used 9 patterns.
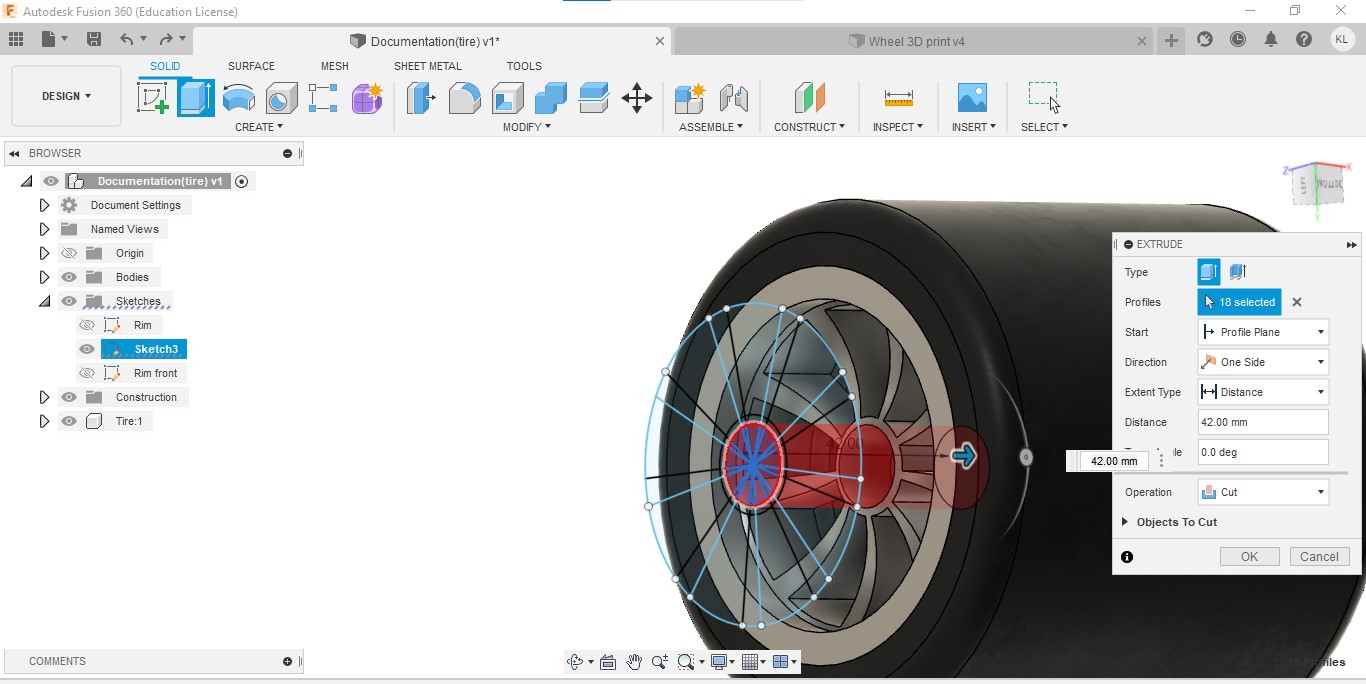
Step 11
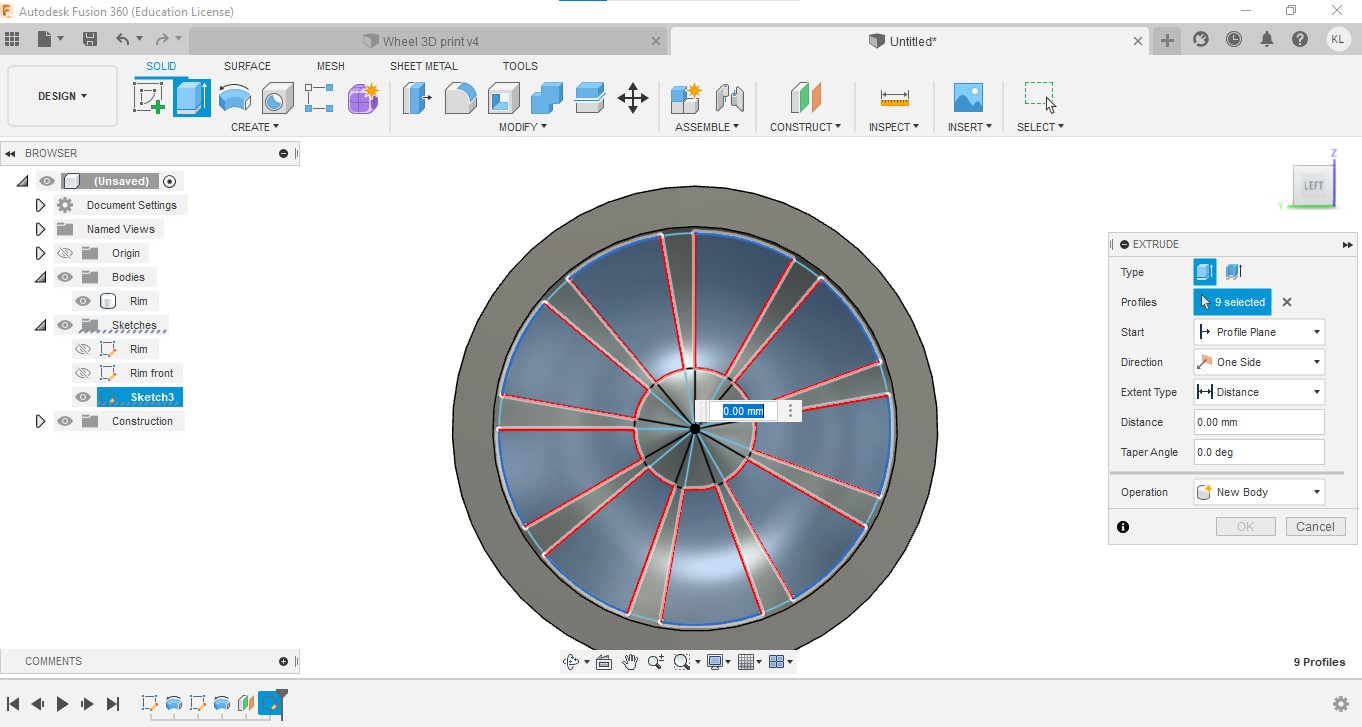
Now,choose the parts that you want to cut away.
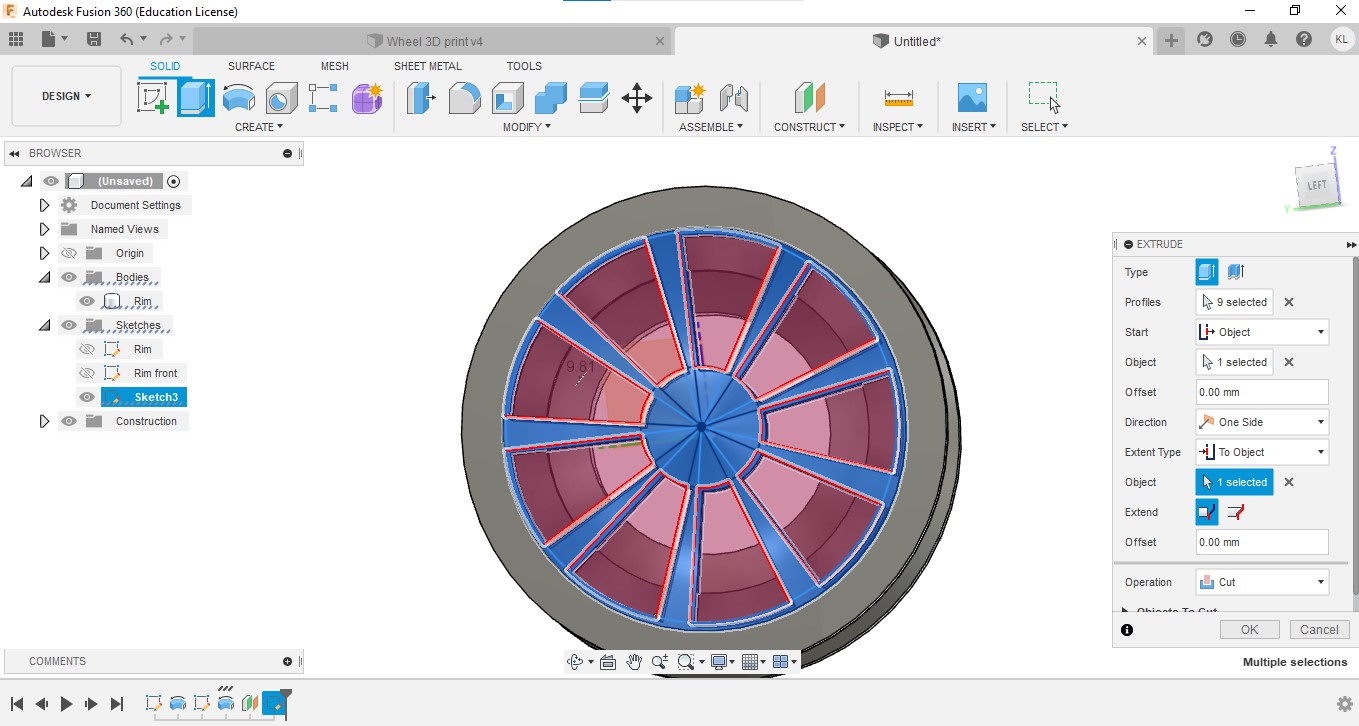
After that, change the Start setting to “object” and click on the front of the rim.
Change the Extend type setting to “to object” and click on the back of the curved surface.

It should look like this once you are done.
Step 12
We are completed with the rim and we will be moving on designing the tire.


We will go back to the sketch of the cross section of the rim. We will create a line from the highest post and connect it to the highest point at the opposite end.

Use the dimension tool and click on the longest line at the top and the line below. We will then key in tire height to get the set value of our tire. Do it for both sides to ensure that the surface is even.
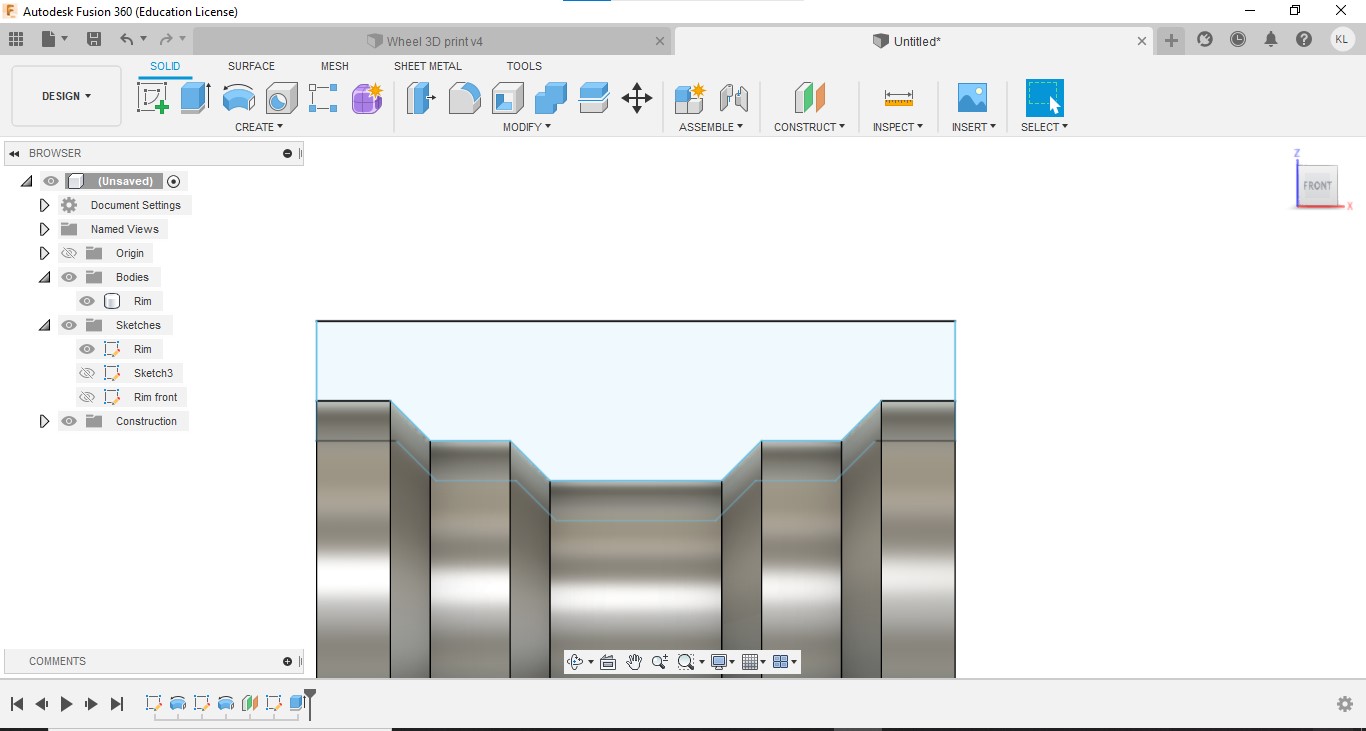
Once we are done with the previous step, click finish sketch and it should look like this.
Step 13

Use the revolve tool and click on the sketch we have just created and make it revolve 360° around the red axis.
Step 14

To make the tire looks more smooth,I will be filleting the edges of the tires by keying in tire fillet. This will give our tire a more rounded look.
Step 15
In order to give a look similar to our reference design, we need to have a wheel hub in the center of our rim.
Using the rim sketch,I created another circle slightly lesser than the diameter of the wheel hub.
After that I chose the parts in that circle that I just created using the extrude tool.
I pull the arrow towards the inner surface of the wheel to remove the middle part of the rim.
Step 16
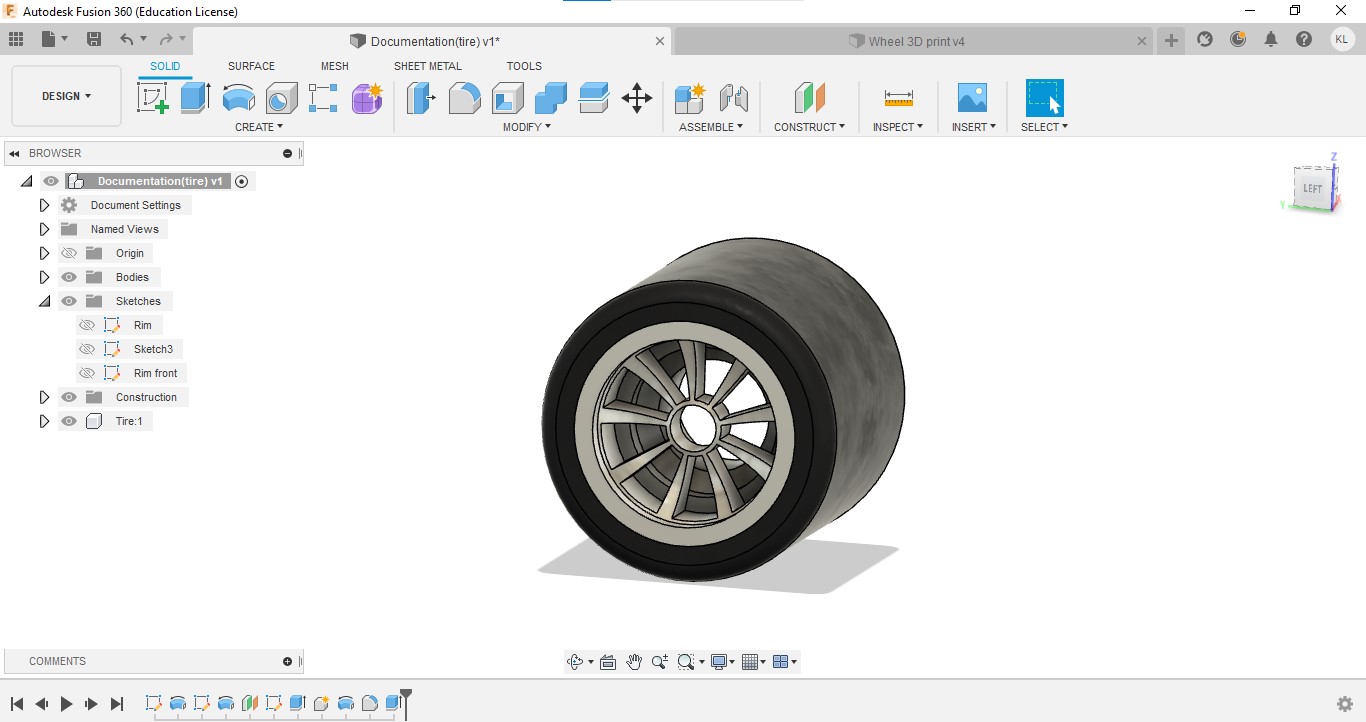
I changed the appearance of the wheel to make it more realistic by applying rubber to the tire and applying a metal appearance to the rims.
Well done! You have just created your first wheel.
Cura
Once we are done here,we can save the component as a stl file.
After that is done,we can upload the stl file on cura where we can edit the settings of our 3D printed object.
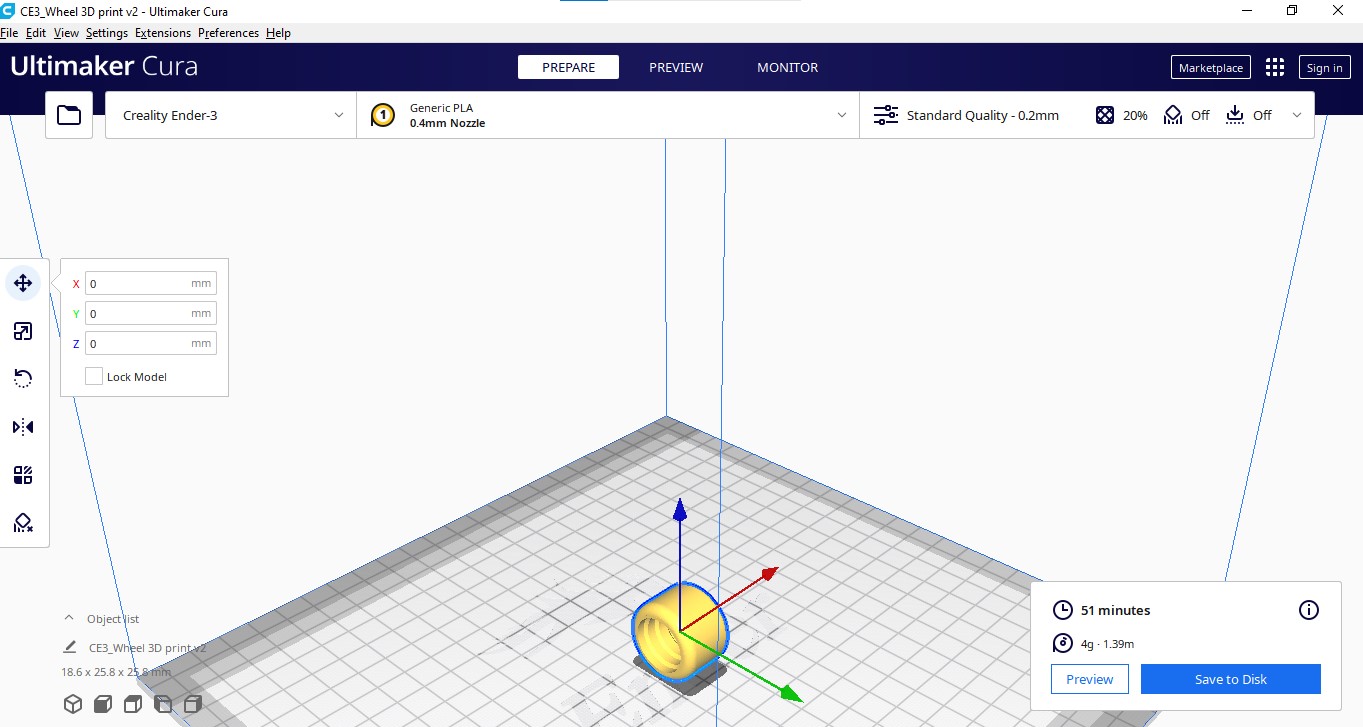
Printing time: 51mins
Cura Settings
Layer Height: 0.1mm
Wall Thickness: 0.8mm
Infill density: 20%
Print speed: 100m/s
Support: Yes
Why could the object not be made subtractively?
The object cannot be made subtractively as the object is similar to a cylinder which cannot be easily replicated by subtractive manufacturing. The design rim cannot be done using subtractive manufacturing as it would be hard to cut it out.
Picture and Videos of the 3D printed object

Reflection
I had enjoyed myself throughout this activity from initially designing my object to 3D printing it out. This activity allowed me to explore more about 3D modeling and it allowed me to learn new functions in Fusion 360. Some examples of the new tools are the circular pattern and the revolve tool. The main objective of this activity was to 3D print an object that could not be done by subtractive manufacturing like laser cutting and it also needed to have a print time of less than 1 hour. I managed to fulfill both of the objectives as I had managed to design a wheel that had curved edges and the design of the rim cannot be easily cut out by a laser cutter. This activity also gave me a better hands-on experience of how a 3D printer works and makes me more comfortable using a 3D printer for my future assignments. I used to feel intimidated by 3D modeling and 3D printing as I always felt that it was too complicated and that it had a steep learning curve which I would not be able to understand. However, after going through this activity and watching content about 3D printing on Youtube, I learned that it is actually quite manageable and that it will be useful for me as it is an additional skill that I can use when entering the workforce.
References
Youtube.com. 2021. Alloy wheel design in Fusion 360. [online] Available at: <https://www.youtube.com/watch?v=Cecfkskwe2s> [Accessed 8 December 2021].

This comment has been removed by the author.
ReplyDelete